ANGULAR | akveo/nebular 系列 - 2.2. 安裝 nebular 到現有專案 | 中文

原文:https://akveo.github.io/nebular/docs/guides/add-into-existing-project#add-into-existing-project

安裝 nebular 到現有專案

如果你還沒有任何 angular 程式碼,請考慮查閱 Angular CLI 文件,以幫助你建立 app。如果你想以我們 ngx-admin 入門套件為基礎,請查看 ANGULAR | akveo/nebular 系列 - 3. 入門套件 | 中文 文章。

使用 ngx-admin 客製化元件
請注意這個指南說明如何安裝 Nebular 模組到您的專案,包含主題系統、認證工具、UI 工具。
如果你想要重複使用 ngx-admin 的任何 客製化 元件(像是溫度小工具、儀表板圖表等 …) 不在使用 ngx-admin 本身時,請根據這個指南以及最後你只需要複製任何你需要的 ngx-admin 客製化元件到你的專案,並且註冊「主題模組」到你的模組中就可以了。

安裝相依函式庫

這個步驟,我們假設您已經安裝 Angular 模組。現在讓我們安裝 Angualr Bootstrap 如下:

1
npm i -S bootstrap

安裝 Nebular 模組

1
npm i -S @nebular/theme @nebular/auth @nebular/security

如果在您的專案中不須要認證/安全的部分,您可以在上方的指令刪除 @nebular/auth@nebular/security


配置 Nebular

在這個階段您已經一切到位了,讓我們配置 Nebular 到 app 模組中。

1
2
3
4
5
6
7
8
9
10
11
12
13

import { NbThemeModule } from '@nebular/theme';

...

@NgModule({
imports: [
...
NbThemeModule.forRoot({ name: 'default' }), // this will enable the default theme, you can change this to `cosmic` to enable the dark theme
]
})
export class AppModule {

以同樣的方式啟動 Auth 模組 (更多詳細內容在 Auth Module Concepts & Install 文章).


安裝樣式

現在讓我們引用 Nebular 樣式

包含 Bootstrap 以及 Nebular 預設主題 CSS 檔案到您的 .angular-cli.json 檔案中:

1
2
3
4
"styles": [
"../node_modules/bootstrap/dist/css/bootstrap.css",
"../node_modules/@nebular/theme/styles/prebuilt/default.css", // or cosmic.css
],

主題系統進階配置
本文章我們描述非常基礎的樣式安裝。如果你需要更多進階功能,像是主題變數管理或是多個主題交換請查閱 Enabling Theme System 文章.

建立一個頁面

現在讓我們在您的專案中建立一個簡單的 Nebular 頁面 (header + sidebar)。我們假設每一頁面有一個模組,讓我們打開您的 some-page.module.ts 以及引用佈局元件 (layout components):

1
2
3
4
5
6
7
8
9
10
11
12
13
14
15
16
17
import { RouterModule } from '@angular/router'; // we also need angular router for Nebular to function properly
import { NbSidebarModule, NbLayoutModule, NbSidebarService } from '@nebular/theme';

...

@NgModule({
...
imports: [
RouterModule, // RouterModule.forRoot(routes, { useHash: true }), if this is your app.module
NbLayoutModule,
NbSidebarModule,
],
providers: [NbSidebarService], // we need this service for the sidebar
...
})
export class SomePageModule {

然後我們加入佈局元件 (layout components) 以及標題到您的 some-page.component.ts:

1
2
3
4
5
6
7
8
9
10
11
12
13
14
15
@Component({
...
template: `

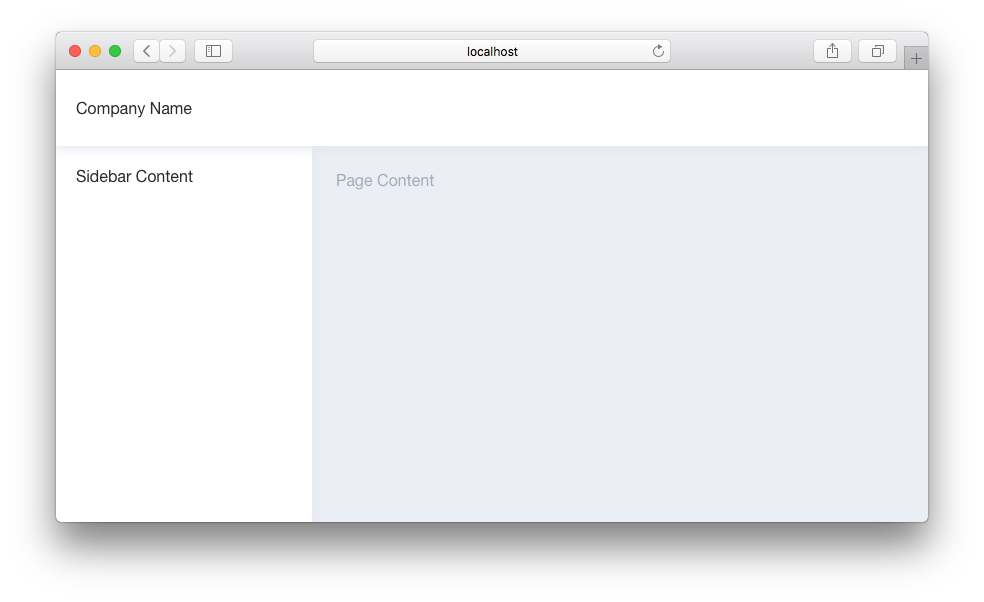
<nb-layout>
<nb-layout-header fixed>Company Name</nb-layout-header>

<nb-sidebar>Sidebar Content</nb-sidebar>

<nb-layout-column>Page Content</nb-layout-column>
</nb-layout>
`
})
export class SomePageComponent {

完成! 在這個步驟你應該有個擁有簡單佈局的頁面如下所是:

image


加入到現有的 page 中
如果您的頁面已經有一些程式碼了,您希望與 Nebular 元件合併使用。
您須要將頁面程式碼放置到這個 Nebular 佈局中。<nb-layout></nb-layout> 是 Nebular 工作所需的根元件。

相關文章


ANGULAR | akveo/nebular 系列 - 2.2. 安裝 nebular 到現有專案 | 中文
http://example.com/2018/07/20/install-into-existing/
Author
John Doe
Posted on
July 20, 2018
Licensed under